

Installation
Up on the wall in four steps.
Every rack goes up the same way: two anchors, two uprights, then the rods. About as hard as hanging a picture.

In the box
- 2 wood uprights (standoffs and rod inserts already attached)
- 2–4 telescoping powder-coated steel rods
- 2 drywall anchors + 2 screws
You’ll need
- Power drill (recommended) or a Phillips screwdriver
- Helpful: pencil, level, tape measure
-

Step 1: Plan your spacing
Choose your width, measured outside to outside. Mark two screw spots level with each other, about 4″ below where the top of the rack will sit, and 3½″ less than your outside width apart.
Tip Standard racks adjust from 28–48″ wide, extra-wide racks from 47–80″.
-

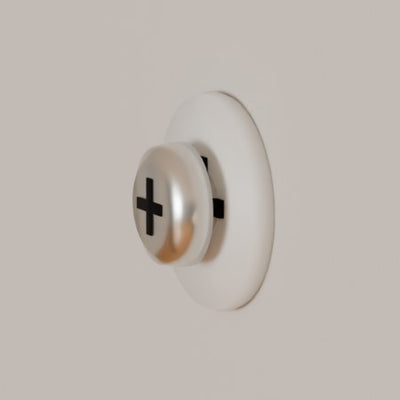
Step 2: Set the anchors and screws
Screw a drywall anchor into the wall at each mark. Drive a screw into each anchor, but stop about ⅛″ short of the wall.
Tip Leave that ⅛″ gap. The standoff on the back of each upright slides over the screw head.
-

Step 3: Hang the uprights
Push the hollow stainless standoff at the top of each upright over its screw head. Like a picture frame, the rack hangs from the top; the bottom standoffs just rest on the wall.
Tip Each anchor is rated to 50 lb.
-

Step 4: Fit the rods
Push the larger end of a rod into the insert on one upright, then guide the smaller end into the other. Repeat for every rod.
Tip 2 rods on 36″ racks, 3 on 44″, 4 on 76″.


Step 5: Hang your scarves.
Drape each scarf over a rod and let the ends hang. Then step back and take the photo.
Printable guides
Keep a copy by the toolbox.
Each sheet covers both widths at that height.
- 36″ tall Chant & Chorus Download (PDF, opens in a new tab) Watch the video – Chant & Chorus
- 44″ tall Tribuna & Terrace Download (PDF, opens in a new tab) Watch the video – Tribuna & Terrace
- 76″ tall Mosaic & Mural Download (PDF, opens in a new tab) Watch the video – Mosaic & Mural


Stuck on a step?
Email us a photo of your wall and we’ll help you sort it out.
Need a hand with your rack?
Or email support@scarfracks.com